
La fresatura del viso è una chiave Processo di lavorazione CNC che si concentra sulla produzione liscia, superfici piane. Questo metodo è ampiamente utilizzato in settori come aerospaziale e automobilistico dove la qualità della superficie precisa è importante. Questa guida spiega il processo, utensili, e suggerimenti utili per rendere la macinazione del viso efficiente e affidabile.
Introduzione
La fresatura del viso è una tecnica di lavorazione semplice. Il suo scopo principale è appiattire le superfici e preparare parti per ulteriori lavori o assemblaggi. A differenza di macinazione tradizionale metodi, Posizionamento della fresatura del viso lo strumento di taglio perpendicolare al pezzo. Questa disposizione consente alla faccia di taglio dello strumento di svolgere la maggior parte del lavoro, rendendolo altamente efficace per la finitura superficiale.
Comprendere la fresatura del viso
La fresatura a faccia comporta l'uso di uno strumento di taglio specializzato per rimuovere il materiale dalla superficie superiore di un pezzo. Si differenzia dalla fresatura periferica, Dove i bordi laterali dello strumento gestiscono il taglio. Questa tecnica consente una rimozione uniforme del materiale e finiture coerenti, rendendolo perfetto per la lavorazione delle superfici piatte.
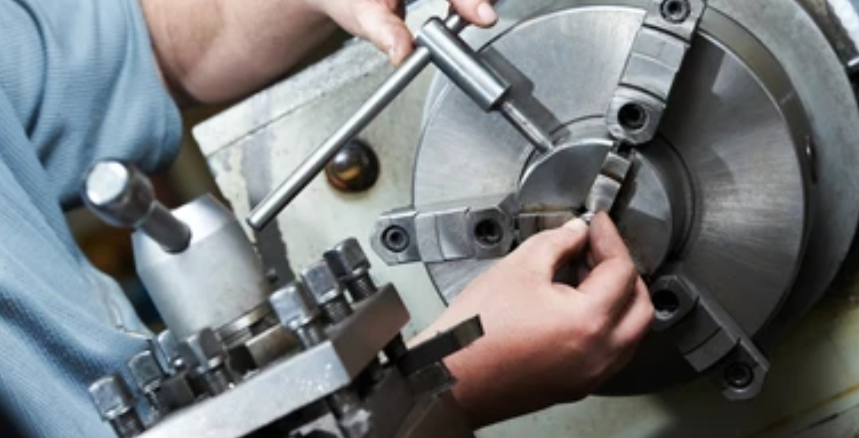
Il processo può essere manuale o automatizzato. Nella fresatura manuale, Il macchinista controlla la velocità di avanzamento a mano, che può portare alla variabilità. Macurizzazione CNC automatizzata, Tuttavia, Fornisce velocità e mangimi costanti, Garantire l'accuratezza e la riduzione degli errori.
Come funziona il processo di fresatura del viso
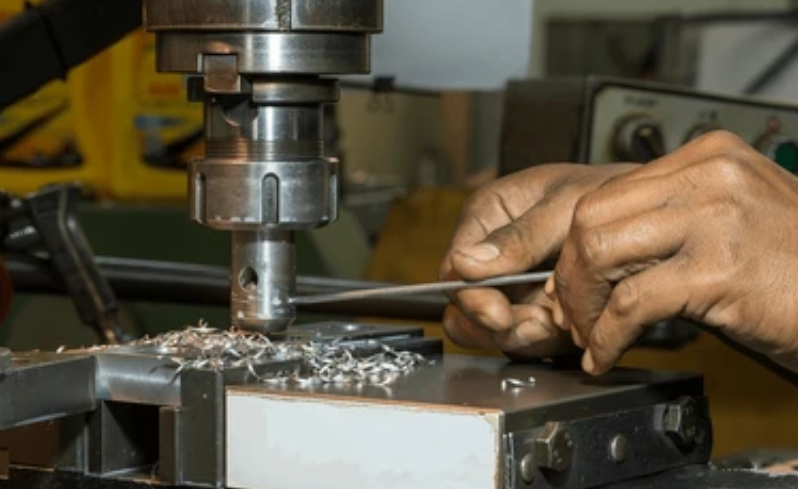
La fresatura del viso prevede quattro passaggi principali:
- Posizionando il pezzo
Il pezzo deve essere bloccato in modo sicuro alla tabella della macchina. Una configurazione stabile impedisce il movimento, che potrebbe compromettere l'accuratezza o gli strumenti di danno. - Impostazione della fresatrice
Lo strumento di macinazione è posizionato perpendicolare al pezzo, Garantire che la parte superiore del cutter gestisca il taglio. Il corretto allineamento è la chiave per ottenere una finitura liscia. - Regolazione della velocità di alimentazione e velocità del mandrino
Questi parametri dipendono dal materiale su cui si lavora e dalla qualità della superficie desiderata. Regolazioni adeguate aiutano a ridurre l'usura degli utensili e migliorare l'efficienza del taglio. - Fase di lavorazione
La fresatura segue le istruzioni programmate per tagliare accuratamente il pezzo. Nelle configurazioni CNC, Ciò garantisce risultati coerenti e processi ripetibili.
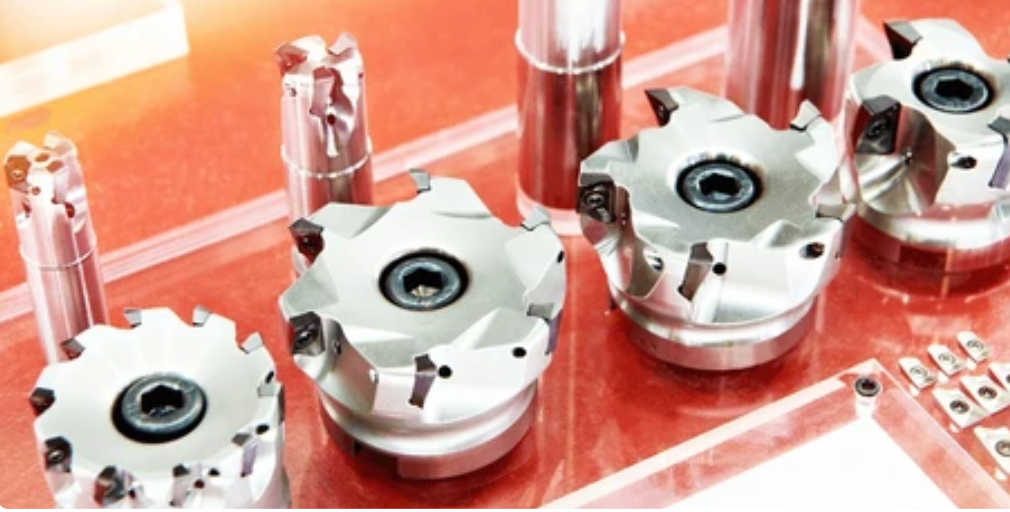
Strumenti utilizzati nella fresatura del viso
- Shell Mills
Questi sono strumenti versatili con bordi multipli. Sono ideali per rimuovere grandi quantità di materiale e produrre finiture coerenti. - Mulini finali
I mulini finali sono adatti per design complessi e finiture estetiche. Tuttavia, Sono meno efficaci per la rimozione dei materiali pesanti a causa dei loro bordi di taglio più piccoli. - Taglie di mosca
I taglieri di mosca hanno un singolo tagliente e vengono utilizzati per finiture. Operano a velocità più lente e sono spesso scelti per materiali morbidi o lavori precisi.
Scegliere lo strumento giusto
- tipo di materiale: Usa i mulini a conchiglia per materiali duri e taglialette per quelli morbidi.
- Lavoro dettagliato: I mulini finali sono una buona scelta per design intricati.
- Angoli di ingresso: 45° Gli strumenti sono versatili, mentre gli strumenti a 90 ° si adattano ai bordi affilati.
- Mangime e velocità: Abbina queste impostazioni allo strumento e al materiale per evitare l'usura.
- Automazione: Le configurazioni automatizzate forniscono una migliore coerenza rispetto alle operazioni manuali.
Tipi di operazioni di fresatura del viso
- Macinazione del viso generale
- Utilizzato per creare superfici piane.
- Meglio con strumenti ad angolo entusiasta a 45 °.
- Assicurarsi che il diametro del cutter sia almeno del 20-50% rispetto al pezzo.
- Macinazione per il viso pesante
- Rimuove grandi quantità di materiale.
- Richiede potenti macchine e strumenti ad angolo entusiasta di 60 °.
- Cancelli regolarmente per evitare il recupero e l'usura degli utensili.
- Fresatura ad alto feed
- Si concentra sul taglio ad alta velocità con velocità di alimentazione superiore a 1000 m/min.
- Strumenti ad angolo basso (10°) Ridurre al minimo lo spessore del chip, Migliorare l'efficienza.
- Finitura superficiale con inserti di tergicristalli
- Utilizza inserti specializzati per migliorare la qualità della superficie.
- Spesso abbinato a inserti standard per mantenere finiture lisce.
Spianatura vs. Fresatura periferica
| Aspetto | Fresatura frontale | Fresatura periferica |
| Orientamento degli utensili | Perpendicolare al pezzo | Parallelo al pezzo |
| Azione di taglio | Usa il viso dello strumento | Utilizza i lati dello strumento |
| Applicazioni | Appiattimento e finitura superficiale | Scanalature profonde e rimozione del materiale |
| Compatibilità della macchina | Adatto per mandrini verticali o orizzontali | Limitato ai mandrini orizzontali |
Suggerimenti pratici per una migliore fresatura del viso
- Mantieni gli strumenti acuti
Gli strumenti affilati producono risultati migliori e riducono l'usura su materiali più duri. - Configurazioni dedicate
Usa configurazioni specifiche per la fresatura del viso invece di fare affidamento su accordi generici. - Regola attentamente i parametri
Calibrare la velocità di avanzamento, profondità di taglio, e velocità del mandrino per il materiale e lo strumento. - UNvuoto tagli sovrapposti
I punti di entrata e uscita ripetuti possono noiosi strumenti e danneggiare i pezzi. - Declutter Workspace
Cancella chip regolarmente per impedire loro di rientrare nel percorso di taglio.
Considerazioni finali
La fresatura del viso è un processo affidabile per creare fluidi, superfici piane. Comprensione degli strumenti, tecniche, e gli aggiustamenti coinvolti possono migliorare notevolmente i risultati. Seguendo questi suggerimenti pratici e usando l'attrezzatura giusta, I macchinisti possono ottenere risultati precisi e coerenti tra varie applicazioni.
Domande frequenti
- In che modo la fresatura del viso differisce dalla fresatura finale?
Face Milling utilizza la parte superiore dello strumento per il taglio, mentre la fresatura finale utilizza entrambi i lati e la fine. - Quali sono gli strumenti principali utilizzati nella fresatura del viso?
Gli strumenti comuni includono i mulini a guscio, frese, e tagliatore di mosche. - È possibile la fresatura del viso senza automazione?
SÌ, Ma i sistemi CNC offrono una migliore precisione ed efficienza. - Qual è l'angolo di ingresso consigliato per la fresatura del viso generale?
Un angolo di ingresso di 45 ° è ideale per la maggior parte delle operazioni. - Quale strumento è meglio per i materiali più morbidi?
I taglieri di mosca sono eccellenti per i materiali morbidi grazie alla loro precisione e al funzionamento più lento.
![]()

1 pensato a “Una panoramica completa della spianatura”