
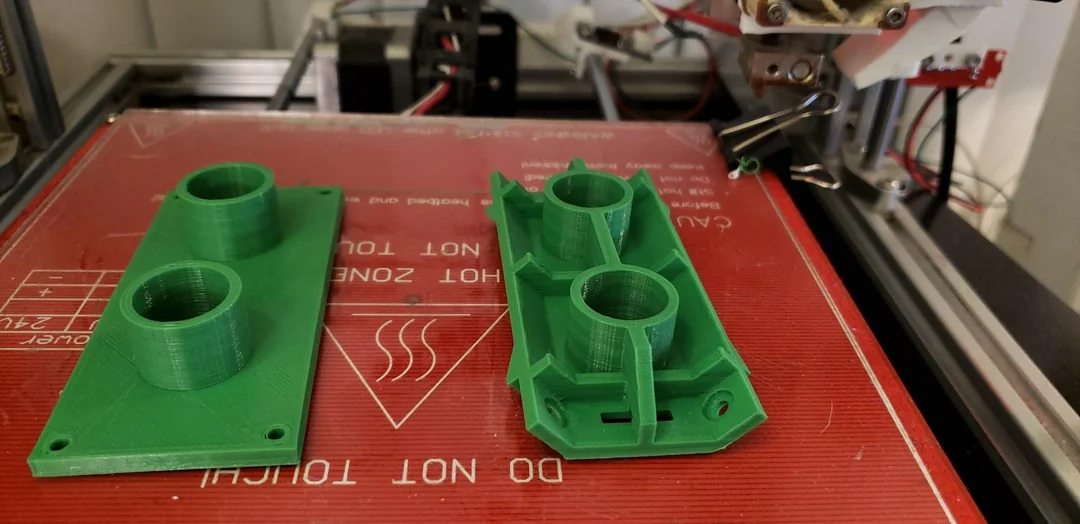
Costelas são finas, recursos de suporte vertical comumente encontrados em peças plásticas moldadas por injeção. Eles servem como estruturas de reforço que aumentam a rigidez e a resistência de uma peça sem adicionar material excessivo ou espessura de parede.
As nervuras adequadamente projetadas não apenas melhoram o desempenho mecânico, mas também evitam defeitos típicos de moldagem, como marcas de pia, vazios, e deformação. Além do seu papel estrutural, costelas também podem ser usadas como elementos de design estético ou funcional, ajudando a melhorar a aparência e o ajuste da montagem.
No entanto, o design das costelas deve ser manuseado com precisão. Proporções ou espaçamentos incorretos das nervuras podem levar a um mau enchimento do molde, ciclos de resfriamento mais longos, ou até mesmo falha parcial. Este guia explora quando incorporar costelas, como projetá-los de forma eficaz, e as melhores práticas essenciais para moldagem por injeção.
Por que o design adequado das costelas é importante
Por que o design adequado das costelas é importante
No design de peças plásticas, manter uma espessura de parede consistente é essencial para obter um resfriamento uniforme e uma tensão residual mínima. Mas aumentar a espessura da parede para fortalecer um componente pode levar a efeitos colaterais indesejados, como marcas de pia e deformação.
Costelas oferecem uma solução inteligente: eles fornecem reforço localizado sem engrossar a parede, mantendo assim a capacidade de fabricação e reduzindo os custos de material. Costelas bem desenhadas podem:
Aumentar a rigidez à flexão e à torção
Evitar a deformação da peça sob carga
Apoie saliências de montagem ou juntas estruturais
Melhore a resistência ao impacto enquanto reduz o peso
Por outro lado, costelas mal projetadas – muito grossas, muito alto, ou muito perto - pode prender o ar, causar inconsistências de resfriamento, ou produzir defeitos superficiais visíveis.
Quando incorporar nervuras em seu design
As nervuras devem ser consideradas durante a fase inicial do projeto, especialmente nos seguintes cenários:
Peças que requerem reforço estrutural sem aumentar a espessura da parede
Peças grandes ou complexas que necessitam de rigidez localizada ou estabilidade dimensional
Componentes sob pressão, torção, ou dobrando cargas (por exemplo., capas, alojamentos)
Peças leves onde a redução do uso de materiais é crítica para a eficiência de custos
Gabinetes e invólucros onde a rigidez e a suavidade estética são desejadas
O uso estratégico de nervuras ajuda a alcançar um equilíbrio ideal entre desempenho mecânico e capacidade de fabricação.
Diretrizes de projeto de nervuras
Diretrizes de projeto de nervuras
Projetar nervuras requer consideração cuidadosa da geometria, espaçamento, e proporções de parede. As diretrizes a seguir resumem as melhores práticas para um projeto eficaz de nervuras em peças moldadas por injeção.
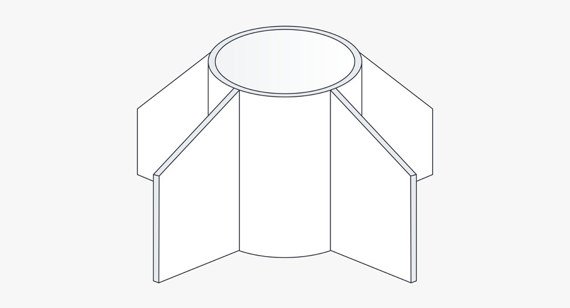
Altura das costelas
A altura das costelas afeta diretamente a rigidez da peça, mas a altura excessiva pode causar problemas de enchimento e acúmulo de estresse.
Recomendado: A altura das costelas deve não exceda 3× a espessura nominal da parede.
Por que: Costelas mais altas são propensas a empenar, vazios, e mau enchimento do molde.
Dica: Use várias costelas curtas em vez de uma única alta para melhor distribuição de força.
Espessura das Costelas
A espessura das costelas é um dos parâmetros mais críticos para evitar marcas de afundamento.
Recomendado: A espessura da costela deve ser 40–60% da espessura nominal da parede.
Por que: Costelas mais grossas esfriam mais lentamente do que as áreas circundantes, levando ao encolhimento e depressões superficiais visíveis.
Dica: Sempre mantenha transições suaves da nervura para a parede da base para garantir um resfriamento uniforme.
Costela Radi
A base de uma costela nunca deve formar um canto agudo.
Recomendado: Adicione um raio igual a 0.5–1× a espessura nominal da parede na base da costela.
Por que: Os cantos arredondados distribuem a tensão uniformemente e evitam rachaduras durante o uso ou ejeção.
Dica: Combine o raio da nervura com o raio da parede adjacente para manter caminhos de fluxo consistentes.
Espaçamento entre costelas
Quando múltiplas costelas são usadas, o espaçamento desempenha um papel importante tanto no desempenho da moldagem quanto no comportamento de resfriamento.
Recomendado: As costelas devem ser espaçadas 2–3× a espessura nominal da parede separado.
Por que: Costelas muito próximas restringem o fluxo de resina e retêm o calor, aumentando o risco de marcas de afundamento e tempos de ciclo prolongados.
Dica: Para grandes painéis ou coberturas, distribua as costelas simetricamente para equilibrar o estresse e as taxas de resfriamento.
Ângulo de inclinação da costela
Um ângulo de saída adequado garante que a peça possa ser ejetada suavemente do molde, sem grudar ou arranhar..
Recomendado: A calado mínimo de 0,5° por lado deve ser aplicado em todas as costelas.
Exceção: Costelas esmagadas usado para ajustes de interferência pode não ter calado.
Dica: Para costelas profundas, aumentar ligeiramente o calado (até 1°) para garantir uma ejeção limpa.
Resumo das regras de design de nervuras
| Parâmetro | Diretriz |
| Altura das costelas | ≤ 3× espessura nominal da parede |
| Espessura das Costelas | ≤ 60% da espessura da parede |
| Raio da Costela | 0.5–1× espessura da parede |
| Espaçamento entre costelas | 2–3× espessura da parede |
| Costela | ≥ 0,5° por lado |
Melhores práticas de moldagem por injeção para design de nervuras
Mesmo que a geometria das costelas siga as proporções acima, práticas de design adicionais são cruciais para garantir moldagem por injeção suave e peças de alta qualidade.
Evite nervuras excessivas
Muitas nervuras aumentam a complexidade do molde, prolongar o tempo do ciclo, e tornar a ejeção mais difícil. Em vez de, aplique costelas estrategicamente onde elas têm o maior benefício estrutural.
Garanta ventilação adequada
As armadilhas de ar geralmente ocorrem perto de bases de costelas ou interseções. A ventilação adequada nessas áreas evita defeitos como tiros curtos, Marcas de queimadura, e jogar.
Mantenha a espessura uniforme da parede
As nervuras devem se misturar às paredes com transições suaves para manter o fluxo e o resfriamento consistentes do material. Evite saltos repentinos de espessura, que pode levar a marcas de pia ou vazios.
Evite transições abruptas de fino para grosso
Projete mudanças graduais entre regiões finas e espessas para minimizar tensões internas e diferenciais de contração.
Alinhar costelas com caminhos de carga
Quando possível, alinhe as nervuras na direção da carga aplicada ou do momento fletor para máxima eficiência de reforço.
Design para fabricação (DFM) Considerações
Antes da fabricação do molde, cada recurso de costela deve ser validado através DFM (Design para fabricação) análise.
Os principais pontos de verificação do DFM incluem:
Verificação da espessura das costelas e ângulos de inclinação
Avaliação da colocação das nervuras para enchimento e ventilação do molde
Simulação de uniformidade e encolhimento de resfriamento
Detecção de potenciais desafios de ejeção e ferramentas
Para obter feedback preciso, exporte seu 3Arquivos D CAD em formato STEP e enviá-los a um parceiro de fabricação confiável. Na máxima precisão (ou prestadores de serviços semelhantes), engenheiros revisam seu projeto e fornecem uma cotação e relatório DFM detalhado, garantindo que seus designs de costelas estejam prontos para produção.
Conclusão
As nervuras são elementos fundamentais no projeto de moldes de injeção de plástico, oferecendo uma maneira inteligente de aumentar a resistência e a rigidez sem sacrificar o peso ou a capacidade de fabricação. Aderindo às diretrizes padrão de design de nervuras – controlando a altura, grossura, espaçamento, e rascunho – você pode melhorar significativamente o desempenho do produto e a consistência da moldagem.
O design cuidadoso das nervuras não apenas evita defeitos como marcas de afundamento e empenamento, mas também reduz os tempos de ciclo, melhora a aparência da peça, e aumenta a durabilidade a longo prazo.
Quando combinado com uma revisão adequada do DFM, geometria de nervura otimizada leva a alta qualidade, componentes plásticos econômicos adequados para produção em massa.
Pronto para melhorar o design da sua peça?
Siga estas regras de projeto de nervuras e envie seus modelos CAD para uma revisão gratuita de projeto para fabricação e orçamento instantâneo.
![]()


1 pensei em “Como projetar nervuras para peças plásticas: Guia de projeto de moldagem por injeção”