



The internal structure of a 3D printed component—particularly its infill density and infill pattern—can significantly affect its strength, 重さ, 物質消費量, printing time, そして全体的なパフォーマンス.
A higher infill percentage does not automatically mean a better part. 多くの用途に, increasing infill beyond a certain point produces diminishing returns while increasing material usage and production time. ある場合には, increasing the number of outer walls can provide a more effective improvement in strength than simply increasing infill density.
それで, what is the best infill density for a strong 3D print? What is the strongest infill pattern? What infill should you use for PLA, PETG, ABS, またはナイロン?
The answer depends on the 材料, 部分ジオメトリ, load conditions, 壁の厚さ, 印刷の向き, および申請要件.
This guide explains how to choose the right 3D printing infill density and pattern while balancing 機械的性能, printing efficiency, 料金, および生産要件.
What Is Infill in 3D Printing?
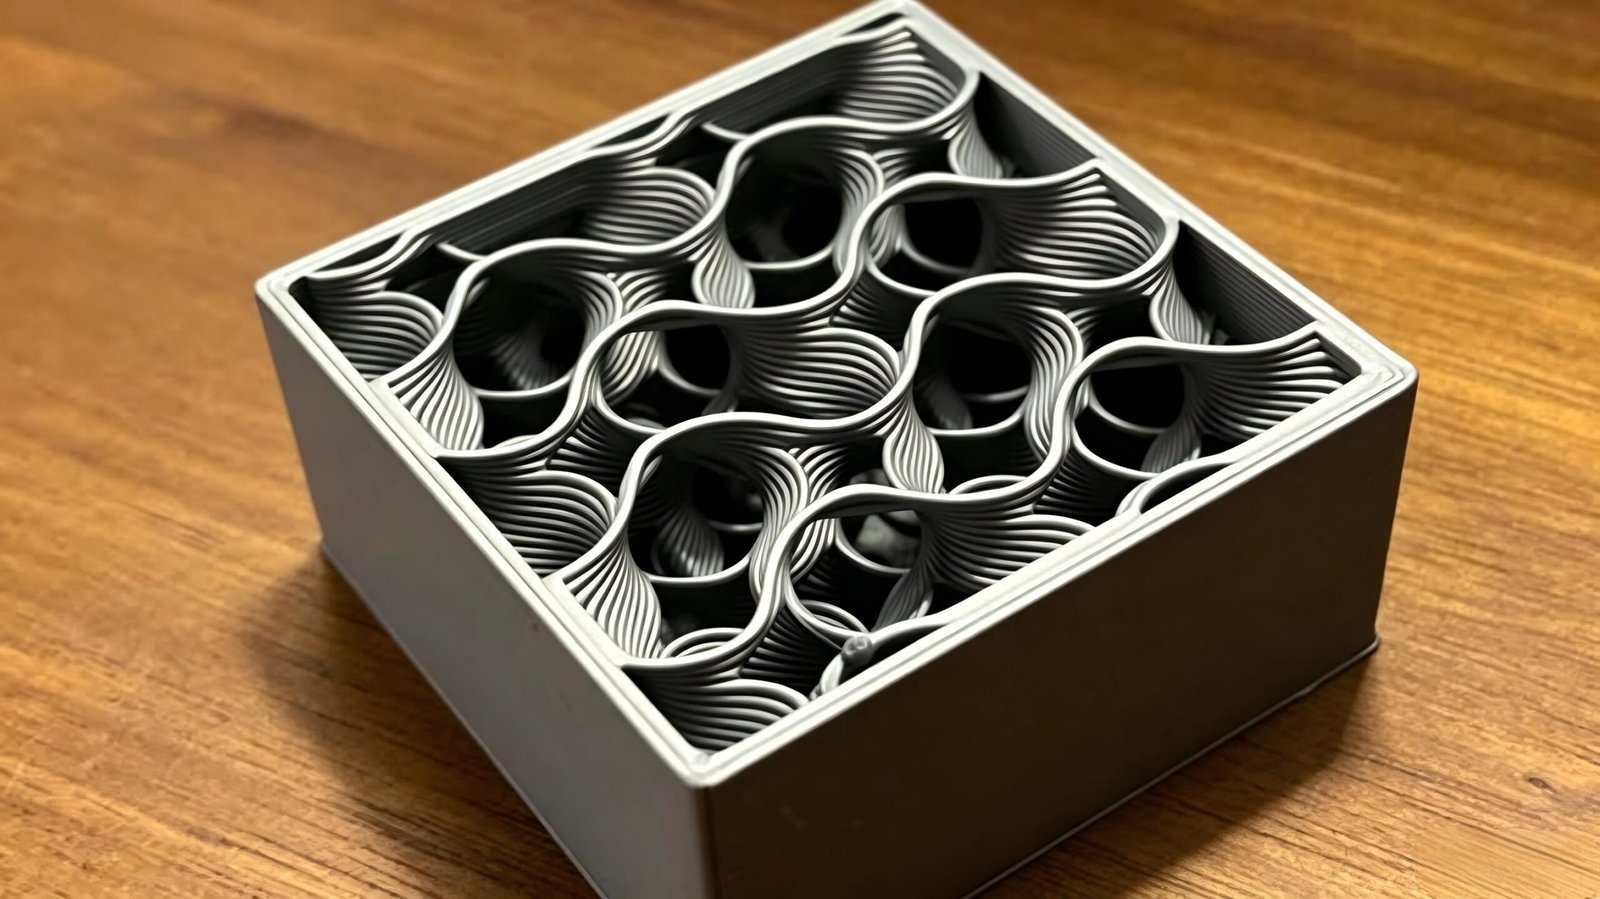
インフィル is the internal structure printed inside the external walls of a 3D printed component.
Instead of printing most FDM parts as completely solid objects, slicing software can create a lightweight internal lattice or pattern between the outer walls. This reduces material consumption and printing time while providing internal support for the top layers of the part.
Infill also contributes to the overall mechanical behavior of the component, particularly its resistance to compression and deformation.
The main parameters associated with infill include:
Infill density
Infill pattern
Infill orientation
Infill-to-wall connection
Number of outer walls or perimeters
Top and bottom solid layers
What Does Infill Density Mean?
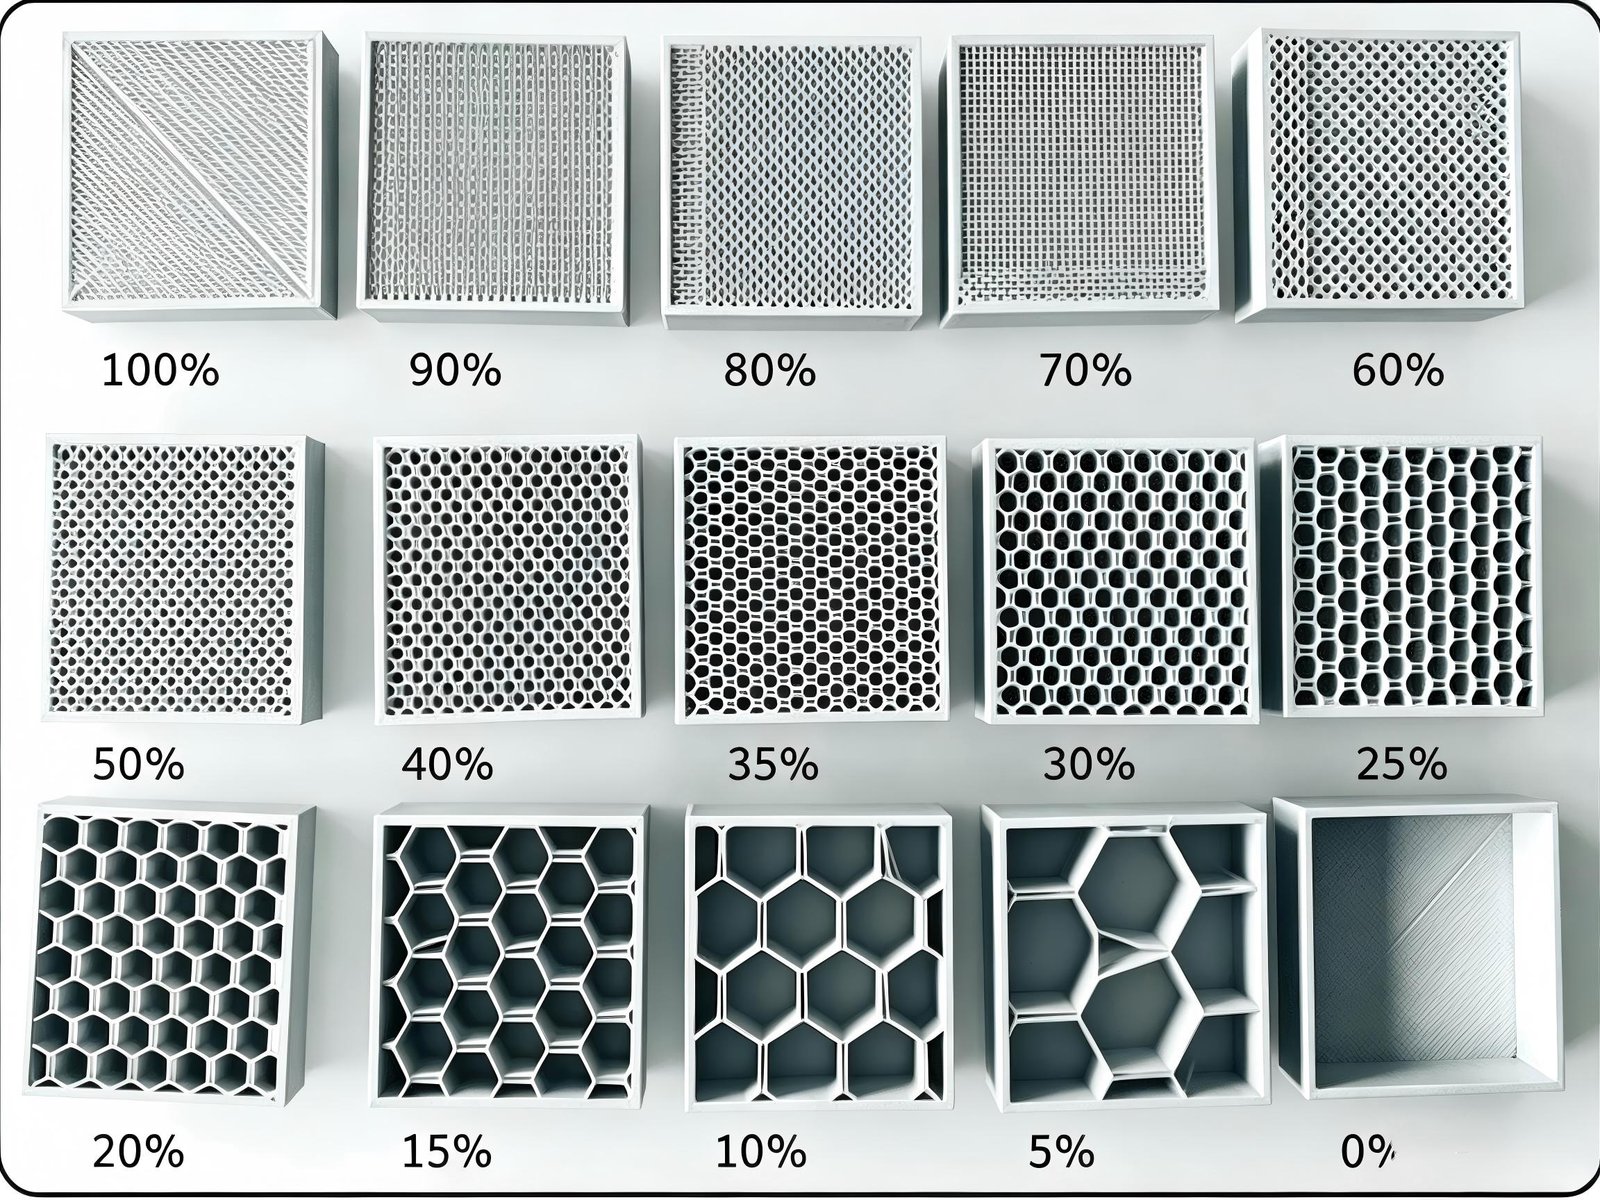
Infill density describes how much of the internal volume of a part is filled with material.
例えば:
0% 詰め物: essentially hollow
10–15%: lightweight internal structure
20–30%: common range for many functional parts
40–60%: higher structural support
100%: solid internal structure
しかし, these percentages should not be treated as universal engineering specifications.
Prusa notes that many models can be printed successfully with approximately 10–15% infill and that infill above 30% is rarely necessary for many general-purpose parts. For applications requiring greater stiffness, 重さ, or compression resistance, higher density may be appropriate.
How Does Infill Density Affect 3D Printed Parts?
Changing infill density affects several characteristics simultaneously.
1. Strength and Stiffness
Increasing infill generally increases the amount of internal material available to resist deformation and compression.
しかし, strength does not increase linearly with infill percentage.
Moving from 10% に 20% infill may produce a meaningful improvement, while moving from 70% に 80% may provide a much smaller benefit relative to the additional material and printing time.
2. 重さ
Lower infill produces lighter components.
これは特に重要です:
ロボット工学
ドローン
自動車部品
Aerospace prototypes
Lightweight fixtures
Moving mechanical assemblies
Ergonomic products
A well-designed internal structure can reduce weight without simply removing material randomly.
3. Material Consumption
Higher infill requires more filament.
That directly affects:
Material cost
Part weight
製造コスト
Material handling
Environmental impact
For high-volume production or large-format components, even a small reduction in infill can generate significant material savings.
4. Printing Time
More internal material means more extrusion and therefore generally longer print times.
If a component does not require high internal density, using unnecessary infill can increase production time without delivering meaningful additional performance.
This becomes especially important when 3D printing is being used for:
迅速なプロトタイピング
小型バッチプロダクション
Bridge manufacturing
カスタマイズされたコンポーネント
Low-volume end-use parts
How Does Material Choice Affect the Ideal Infill Density?
There is no single best infill percentage for every filament.
Different polymers have different mechanical and thermal characteristics, so the appropriate combination of 材料 + 詰め物 + 壁の厚さ + 印刷の向き should be selected according to the application.
人民解放軍
PLA is easy to print and commonly used for prototypes, 備品, models, and general-purpose components.
Typical considerations include:
簡単な加工
Good stiffness
Relatively brittle behavior
限られた高温性能
For many non-critical PLA components, moderate infill is sufficient.
PETG
PETG provides a useful combination of toughness, 柔軟性, and relatively good temperature resistance.
It is often considered for:
機能的なプロトタイプ
ブラケット
ハウジング
Mechanical covers
Workshop components
PETG can benefit from appropriate infill and perimeter settings when impact resistance and durability are important.
ABS
ABS is useful when higher temperature resistance and toughness are required.
しかし, ABS can be more challenging to print because of:
反り
収縮
温度感度
Need for controlled printing conditions
Increasing infill does not eliminate these issues. Printer setup and thermal management remain important.
ナイロン
Nylon is well suited to applications requiring:
高い耐衝撃性
靭性
Mechanical durability
耐摩耗性
しかし, nylon is hygroscopic, meaning it absorbs moisture from the environment. Proper filament drying and storage are therefore important for consistent printing quality.
Carbon-Fiber-Reinforced Filaments
Carbon-fiber-filled PLA, PETG, ナイロン, and other engineering materials can provide significantly higher stiffness than their unfilled counterparts.
This creates an important design opportunity:
A stiffer material may allow a lower infill density while maintaining the required structural performance.
したがって, changing the material can sometimes be more effective than simply increasing infill.
What Is the Best 3D Printing Infill Pattern?
Infill density is only one part of the equation.
の infill pattern determines how material is distributed inside the component.
Different patterns are optimized for different priorities, 含む:
強さ
Print speed
材料効率
柔軟性
Top-layer support
Multi-directional loading
Prusa’s current documentation specifically highlights print speed, 材料効率, top-layer support, 外観, and flexibility as important factors when selecting an infill pattern.
Rectilinear Infill
Rectilinear infill uses straight lines that change direction between layers.
利点
シンプルなジオメトリ
Fast printing
Efficient material usage
加工が簡単
Suitable for many general-purpose parts
It is particularly useful when production speed is more important than maximum mechanical performance.
Prusa identifies rectilinear as one of the fastest infill types and recommends it for 100% infill printing.
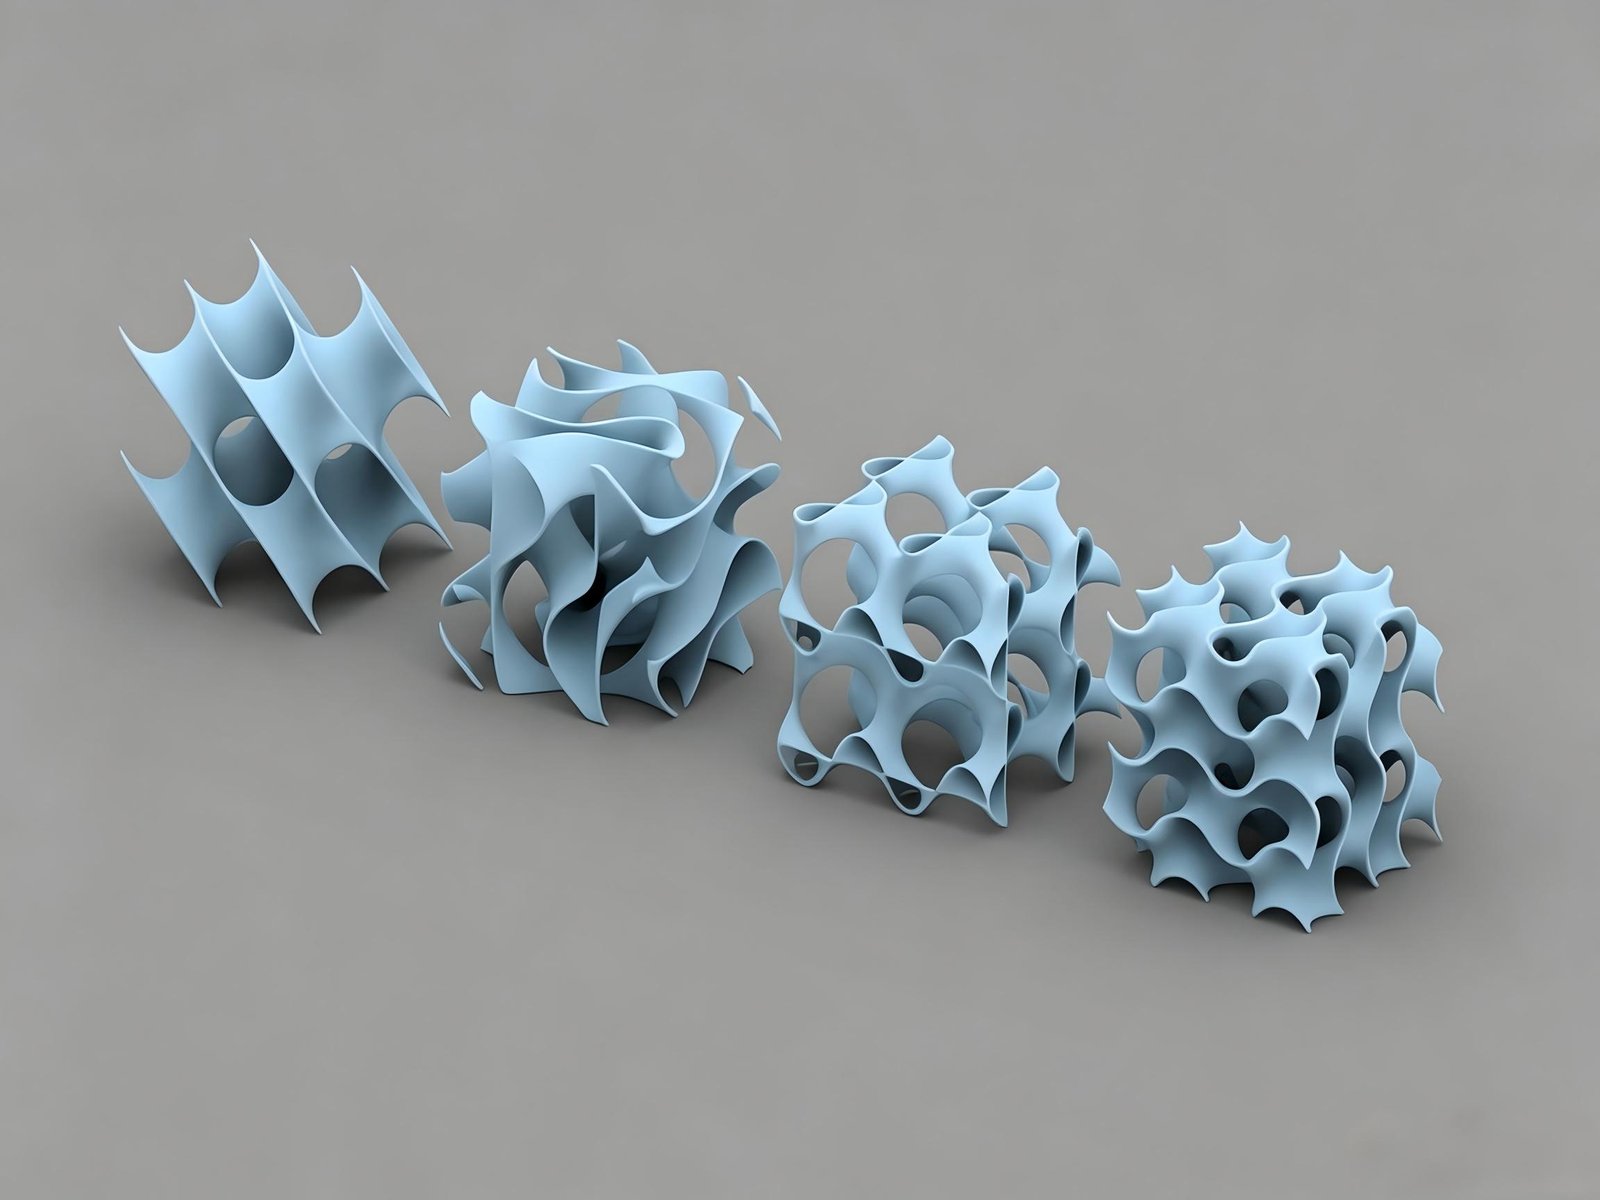
Gyroid Infill
Gyroid is a three-dimensional, continuously curved structure.
Its major advantage is its ability to provide relatively uniform support and mechanical behavior in multiple directions.
利点
優れた強度重量比
Multi-directional structural behavior
Efficient material usage
Relatively smooth extrusion paths
Suitable for functional components
For mechanical parts subjected to loads from different directions, gyroid can be an excellent option. Prusa describes gyroid as a 3D structure providing support in every direction with a good strength-to-weight ratio.
Cubic Infill
Cubic infill creates a three-dimensional lattice structure.
It can be particularly useful for functional components subjected to complex loading.
Suitable applications include:
メカニカルブラケット
備品
ツーリング
機能的なプロトタイプ
構造コンポーネント
Prusa also recommends 3D infill types such as cubic and gyroid for mechanical parts.
Concentric Infill
Concentric infill follows the shape of the external perimeter.
It can be useful for:
円筒部品
Curved parts
Flexible components
Transparent models
Parts where directional flexibility is desirable
例えば, concentric infill can be useful in certain flexible or tire-like printed components.
Lightning Infill
Lightning infill uses a branching internal structure that concentrates material where it is needed to support upper surfaces.
Its main objective is material and time reduction, rather than maximum strength.
It is therefore better suited to:
展示モデル
コンセプトモデル
ビジュアルプロトタイプ
Non-functional components
What Is the Strongest Infill Pattern?
There is no universal answer to the question “What is the strongest 3D printing infill pattern?」
The answer depends on the type and direction of loading.
例えば:
Multi-directional loading: Gyroid or cubic
General mechanical applications: Cubic or gyroid
Lightweight structural designs: Adaptive cubic or other variable-density structures
Simple non-critical parts: 直線的
Maximum material efficiency: Lightweight/branching patterns
The key point is that strength should be evaluated as a system, rather than by looking at the infill pattern alone.
A component with 30% gyroid infill and four strong perimeters may outperform a component with 70% infill but inadequate wall thickness or poor print orientation.
Infill Density vs. 肉厚: Which Is More Important?
This is one of the most important considerations for functional 3D printed parts.
Many beginners assume that increasing infill is the easiest way to make a part stronger.
実際には, the outer walls or perimeters often have a major influence on the structural performance of the component.
Prusa explicitly states that model strength is mostly defined by the number of perimeters rather than infill, while infill is particularly useful for increasing compression resistance.
例
Suppose you have a component printed at:
20% 詰め物
2 perimeters
Instead of immediately increasing infill to 50%, you may first evaluate:
3 または 4 perimeters
印刷方向の改善
Appropriate material
Improved layer adhesion
A more suitable infill pattern
This can produce a better strength-to-weight ratio.
Practical Design Principle
Use the outer shell to carry major loads and use infill to support the internal structure and manage compression.
This principle is particularly important when designing brackets, ハウジング, 備品, ツーリング, and other functional components.
What Infill Density Should You Use?
There is no universal percentage, but the following framework can be used as a starting point:
| 応用 | Typical Starting Point | Recommended Approach |
| Decorative model | 0–15% | Prioritize speed and material savings |
| Visual prototype | 10–20% | Lightweight infill |
| General prototype | 15–25% | Balance strength and speed |
| Functional prototype | 20–40% | Combine suitable infill with sufficient walls |
| Mechanical component | 25–50%+ | Evaluate load conditions and print orientation |
| High-load component | Application-specific | Engineering validation recommended |
These values are starting points rather than guaranteed engineering specifications. Actual performance depends heavily on geometry, 材料, 印刷の向き, 壁の厚さ, 層の接着力, and printer settings.
For many general-purpose parts, Prusa indicates that 10–15% is often sufficient and that infill above 30% is rarely needed, while higher values can be appropriate when greater stiffness, 重さ, or compression resistance is required.
What Is the Fastest Infill Pattern?
If printing speed is the priority, simple patterns are usually preferable.
Lines / 直線的
These patterns use relatively straightforward extrusion paths.
Lightning
Lightning infill can reduce material and printing time even further by concentrating material near areas that require support.
しかし, the trade-off is lower structural performance.
Zigzag
Zigzag-style paths can provide continuous extrusion while maintaining reasonable speed.
For rapid prototyping, the best solution is often not the strongest possible infill, しかし、 lowest infill that provides sufficient functionality.
How to Balance Infill Density, 強さ, and Print Quality
Selecting a percentage is only the beginning.
The final quality of a 3D printed part depends on how infill interacts with the rest of the printing parameters.
Infill Overlap and Anchoring
The internal infill needs to connect effectively with the outer walls.
If the connection is too weak, the internal structure may not effectively support the shell.
Modern slicers also use infill anchors to improve the connection between infill and perimeters.
Surface Quality
Low infill can sometimes contribute to poor top-surface quality because the top layers have less internal support underneath them.
Increasing infill can help in some geometries, but another solution may be to optimize:
Top-layer thickness
Top-layer count
Infill pattern
Printing temperature
冷却
Print orientation
Advanced 3D Printing Infill Techniques
For engineering applications, fixed-density infill is not always the most efficient approach.
Advanced slicing strategies allow the internal structure to be optimized according to the geometry and expected loads.
Variable Infill Density
Instead of using the same density throughout the entire part, different regions can use different densities.
This can reduce weight and material consumption without unnecessarily reducing structural performance.
Adaptive Infill
Adaptive infill automatically changes the internal structure according to the geometry.
Prusa’s adaptive cubic infill, 例えば, automatically changes density according to the distance from the walls and can reduce material consumption compared with conventional rectilinear infill.
3D Printing Infill for Prototypes vs. 生産部品
The optimal infill strategy can change dramatically depending on the purpose of the part.
For Rapid Prototypes
The priorities are usually:
Speed → Low cost → Acceptable strength
A lower infill percentage and faster pattern may therefore be appropriate.
For Functional Prototypes
The priorities become:
Strength → Dimensional stability → Material efficiency → Speed
A medium infill combined with appropriate walls and a suitable engineering material is often more appropriate.
For End-Use Parts
The requirements are more demanding.
You may need to consider:
機械的負荷
環境条件
温度
化学物質への曝露
倦怠感
寸法安定性
Regulatory requirements
再現性
In these applications, infill should be treated as one component of the overall engineering design rather than an isolated slicer setting.
Common 3D Printing Infill Mistakes
間違い 1: Assuming 100% Infill Is Always Strongest
More material does not automatically solve every structural problem.
Poor orientation, weak layer adhesion, insufficient walls, or unsuitable material can still cause failure.
間違い 2: Increasing Infill Instead of Increasing Wall Thickness
If the failure occurs at the external shell, increasing internal infill may have limited benefit.
間違い 3: Choosing the Pattern Only by Its Name
“Gyroid” or “cubic” does not automatically mean stronger for every application.
The actual loading condition matters.
間違い 4: Ignoring Print Orientation
FDM parts are anisotropic. Their mechanical behavior can differ significantly depending on the direction of the applied load relative to the printed layers.
間違い 5: Using Complex Infill with Flexible Filaments
Complex internal structures can be more difficult to print with flexible materials. Prusa specifically recommends simpler patterns such as Grid for flexible filaments when infill problems occur.
間違い 6: Optimizing Only for Strength
A component that is unnecessarily heavy and expensive is not necessarily a better engineering solution.
The goal should be sufficient performance with efficient material usage and production time.
Frequently Asked Questions About 3D Printing Infill
What is the best infill density for strong 3D prints?
There is no universal best percentage. A moderate density combined with sufficient wall thickness, appropriate material, and correct print orientation is often more effective than simply maximizing infill.
は 20% infill strong enough?
For many prototypes and general-purpose parts, 20% can be a useful starting point. しかし, the required density depends on geometry, 材料, loading, and wall thickness.
最強の 3D プリントインフィルパターンは何ですか?
For many functional applications, Gyroid and Cubic are strong candidates because they create three-dimensional internal structures. しかし, the best pattern depends on the direction and type of loading.
Is Gyroid stronger than Cubic?
Not universally. Both can provide good mechanical performance, but the appropriate choice depends on geometry, 材料, loading conditions, and printer settings.
What is the fastest infill pattern?
Simple patterns such as Rectilinear/Lines are generally among the fastest options because their toolpaths are relatively straightforward.
充填材を多くすると 3D プリントが強くなりますか??
一般的に, increasing infill can improve certain aspects of strength, especially compression resistance, しかしその関係は直線的ではありません. 壁の厚さ, 印刷の向き, 材料, and layer adhesion can be more important.
は 100% infill necessary for functional parts?
通常はそうではありません. Many functional parts can achieve adequate performance with significantly less than 100% 詰め物. Prusa notes that many models can use 10–15% and that infill above 30% is rarely required for general applications, although demanding parts may require more.
壁の厚さは充填物よりも重要ですか?
多くの FDM コンポーネントに対応, はい. The outer perimeters often have a greater influence on overall strength than simply increasing infill.
How can I reduce 3D printing cost without sacrificing strength?
Consider optimizing the combination of:
材料
壁の厚さ
Infill density
Infill pattern
Print orientation
Variable/adaptive infill
部品の形状
The objective should be to remove unnecessary material rather than simply reducing the infill percentage.
結論: Choose the Right Infill, Not the Highest Infill
3D printing infill density is an engineering optimization problem, not simply a percentage setting.
The best result comes from balancing:
強さ + 重さ + 素材の使用法 + Print Time + 料金 + 申請要件
For general prototypes, relatively low infill may be sufficient. For functional mechanical components, a combination of appropriate wall thickness, 材料, 印刷の向き, and a 3D infill pattern such as Gyroid or Cubic can provide better performance.
For larger or more complex parts, variable and adaptive infill can further improve material efficiency.
最も重要なこと, do not assume that increasing infill from 20% に 50% または 100% is always the best solution. Start with the load case and functional requirements, then optimize the complete print strategy around them.
If you are developing a custom 3D printed component and are unsure which material, infill density, 壁の厚さ, or printing strategy is appropriate, providing the 3D CADファイル, 2D図, 材料要件, 量, およびアプリケーション allows 精度の高いトップ to evaluate the design and recommend a practical production solution.


