



A estrutura interna de um componente impresso em 3D – particularmente a sua densidade de preenchimento e padrão de preenchimento—pode afetar significativamente sua força, peso, consumo de materiais, tempo de impressão, e desempenho geral.
Uma porcentagem de preenchimento mais alta não significa automaticamente uma peça melhor. Para muitas aplicações, aumentar o preenchimento além de um certo ponto produz retornos decrescentes enquanto aumenta o uso de material e o tempo de produção. Em alguns casos, aumentar o número de paredes externas pode proporcionar uma melhoria mais eficaz na resistência do que simplesmente aumentar a densidade de preenchimento.
Então, qual é a melhor densidade de preenchimento para uma impressão 3D forte? Qual é o padrão de preenchimento mais forte? Qual preenchimento você deve usar para PLA, PETG, abdômen, ou nylon?
A resposta depende do material, geometria de parte, condições de carga, espessura da parede, orientação de impressão, e requisitos de aplicação.
Este guia explica como escolher a densidade e o padrão de preenchimento de impressão 3D corretos enquanto equilibra desempenho mecânico, eficiência de impressão, custo, e requisitos de produção.
O que é preenchimento na impressão 3D?
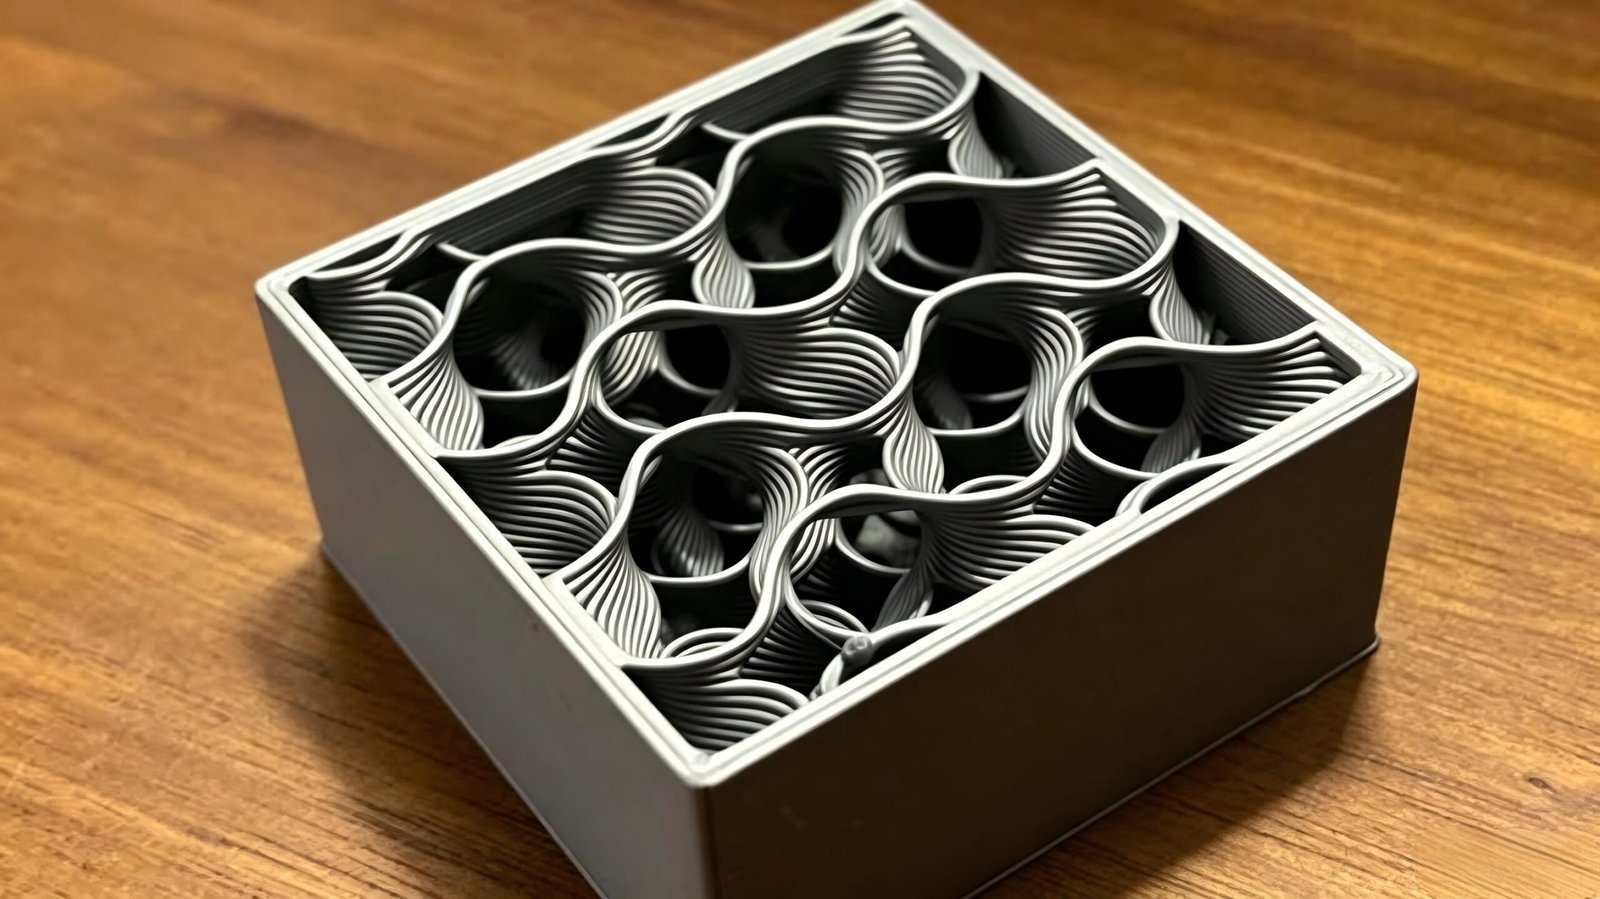
Preencher é a estrutura interna impressa dentro das paredes externas de um componente impresso em 3D.
Em vez de imprimir a maioria das peças FDM como objetos completamente sólidos, o software de fatiamento pode criar uma estrutura ou padrão interno leve entre as paredes externas. Isto reduz o consumo de material e o tempo de impressão, ao mesmo tempo que fornece suporte interno para as camadas superiores da peça.
O preenchimento também contribui para o comportamento mecânico geral do componente, particularmente sua resistência à compressão e deformação.
Os principais parâmetros associados ao preenchimento incluem:
Densidade de preenchimento
Padrão de preenchimento
Orientação de preenchimento
Conexão de preenchimento à parede
Número de paredes externas ou perímetros
Camadas sólidas superior e inferior
O que significa densidade de preenchimento?
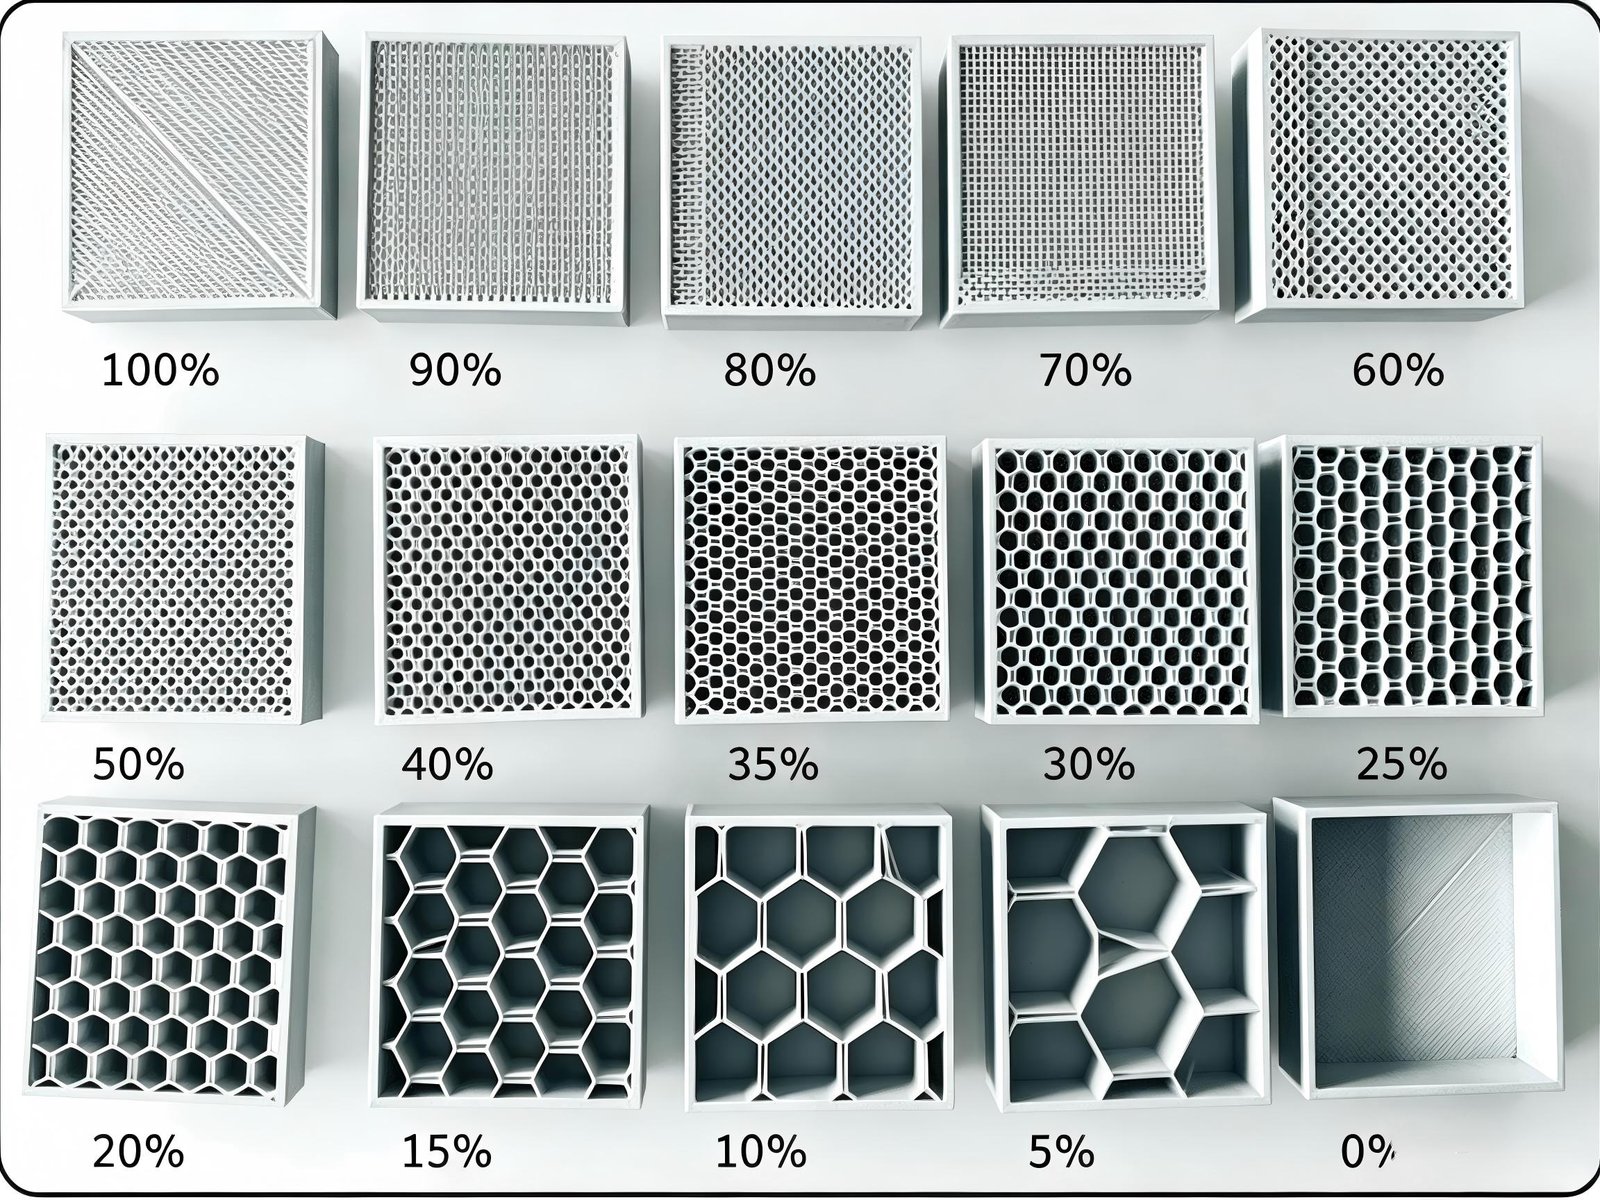
Densidade de preenchimento descreve quanto do volume interno de uma peça é preenchido com material.
Por exemplo:
0% preencher: essencialmente oco
10–15%: estrutura interna leve
20–30%: faixa comum para muitas peças funcionais
40–60%: maior suporte estrutural
100%: estrutura interna sólida
No entanto, essas porcentagens não devem ser tratadas como especificações universais de engenharia.
Prusa observa que muitos modelos podem ser impressos com sucesso com aproximadamente 10–15% de preenchimento e esse preenchimento acima 30% raramente é necessário para muitas peças de uso geral. Para aplicações que exigem maior rigidez, peso, ou resistência à compressão, densidade mais alta pode ser apropriada.
Como a densidade de preenchimento afeta as peças impressas em 3D?
A alteração da densidade de preenchimento afeta diversas características simultaneamente.
1. Força e Rigidez
Aumentar o preenchimento geralmente aumenta a quantidade de material interno disponível para resistir à deformação e à compressão.
No entanto, a resistência não aumenta linearmente com a porcentagem de preenchimento.
Movendo-se de 10% para 20% o preenchimento pode produzir uma melhoria significativa, enquanto se desloca de 70% para 80% pode fornecer um benefício muito menor em relação ao material adicional e ao tempo de impressão.
2. Peso
O preenchimento inferior produz componentes mais leves.
Isto é particularmente importante para:
Robótica
Drones
Componentes automotivos
Protótipos aeroespaciais
Equipamentos leves
Movendo montagens mecânicas
Produtos ergonômicos
Uma estrutura interna bem projetada pode reduzir o peso sem simplesmente remover material aleatoriamente.
3. Consumo de materiais
Um preenchimento maior requer mais filamento.
Isso afeta diretamente:
Custo de materiais
Peso da peça
Custo de produção
Manuseio de materiais
Impacto ambiental
Para produção de alto volume ou componentes de grande formato, mesmo uma pequena redução no preenchimento pode gerar economias significativas de material.
4. Tempo de impressão
Mais material interno significa mais extrusão e, portanto, tempos de impressão geralmente mais longos.
Se um componente não exigir alta densidade interna, usar preenchimento desnecessário pode aumentar o tempo de produção sem fornecer desempenho adicional significativo.
Isto se torna especialmente importante quando a impressão 3D está sendo usada para:
Prototipagem rápida
Produção em pequenos lotes
Fabricação de pontes
Componentes personalizados
Peças de uso final de baixo volume
Como a escolha do material afeta a densidade de preenchimento ideal?
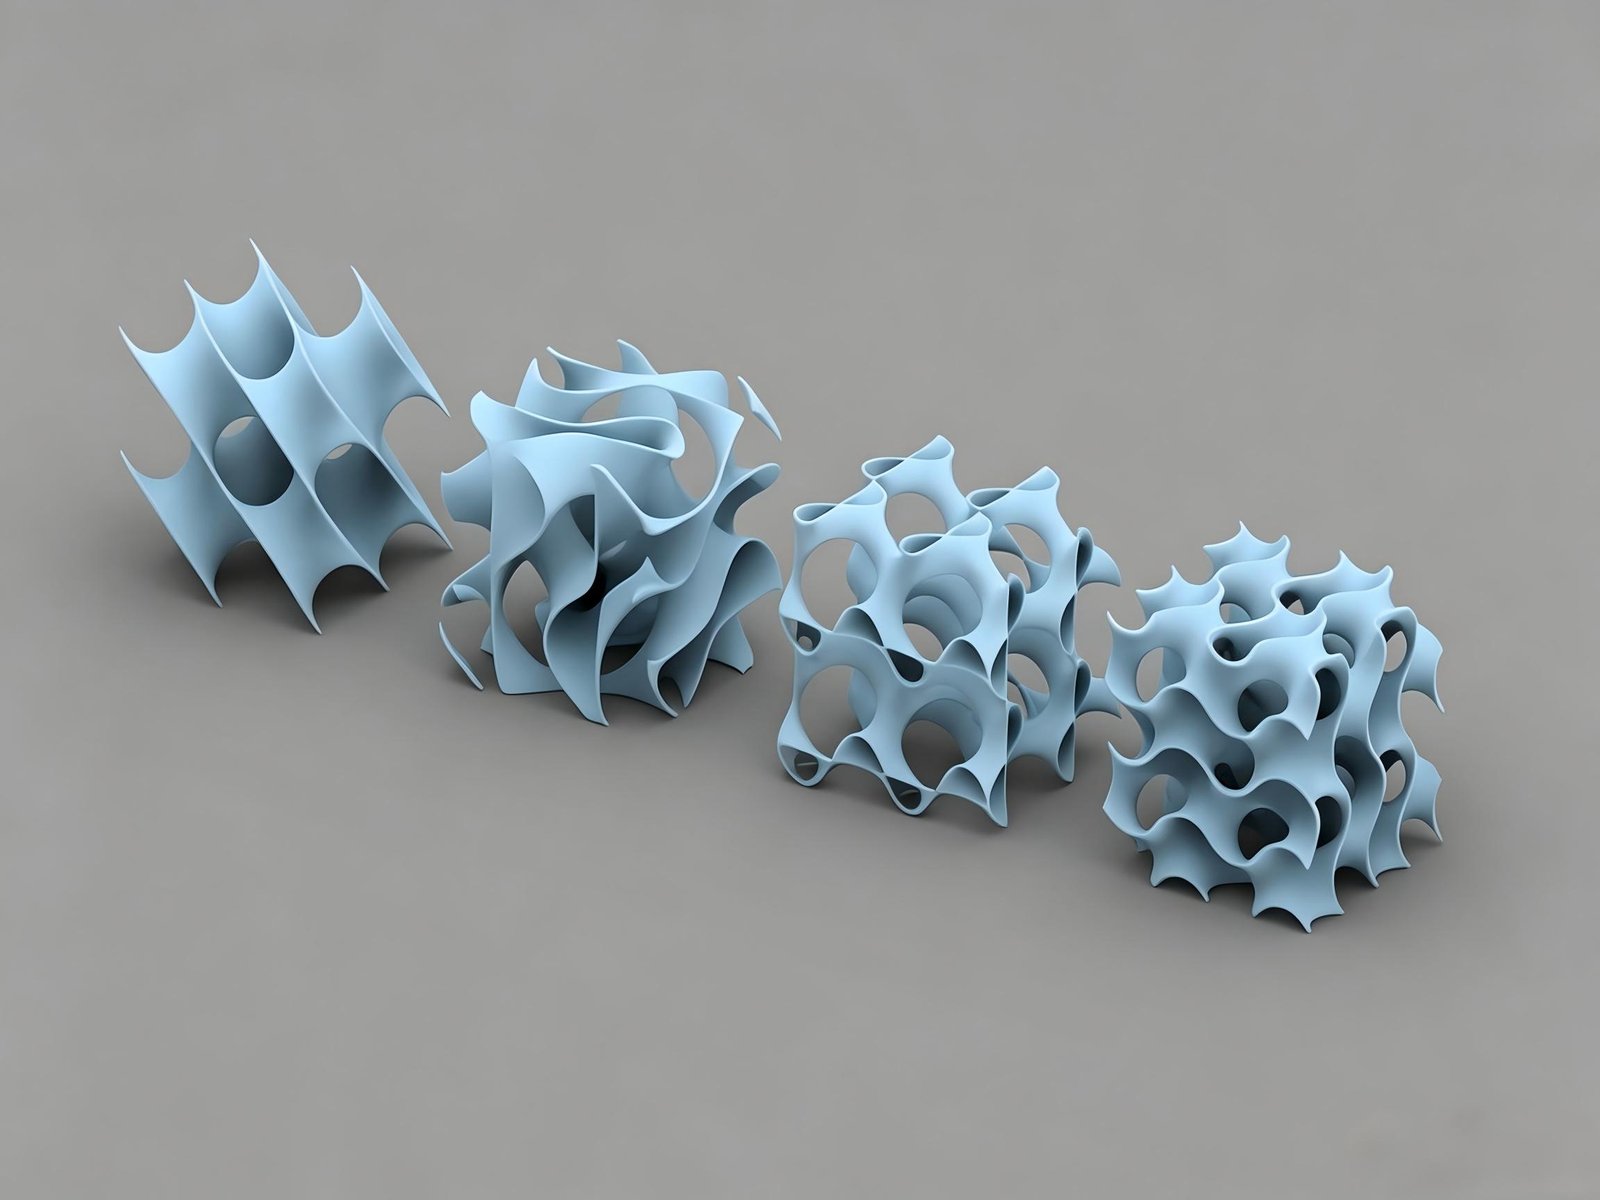
Não existe uma melhor porcentagem de preenchimento para cada filamento.
Diferentes polímeros têm diferentes características mecânicas e térmicas, então a combinação apropriada de material + preencher + espessura da parede + orientação de impressão deve ser selecionado de acordo com a aplicação.
PLA
PLA é fácil de imprimir e comumente usado para protótipos, jogos, modelos, e componentes de uso geral.
Considerações típicas incluem:
Processamento fácil
Boa rigidez
Comportamento relativamente frágil
Desempenho limitado em altas temperaturas
Para muitos componentes PLA não críticos, preenchimento moderado é suficiente.
PETG
PETG fornece uma combinação útil de resistência, flexibilidade, e resistência à temperatura relativamente boa.
Muitas vezes é considerado para:
Protótipos funcionais
Suportes
Caixas
Tampas mecânicas
Componentes da oficina
PETG pode se beneficiar de configurações apropriadas de preenchimento e perímetro quando a resistência ao impacto e a durabilidade são importantes.
abdômen
O ABS é útil quando são necessárias maior resistência a temperaturas e tenacidade.
No entanto, O ABS pode ser mais difícil de imprimir devido:
Deformação
Encolhimento
Sensibilidade à temperatura
Necessidade de condições de impressão controladas
Aumentar o preenchimento não elimina esses problemas. A configuração da impressora e o gerenciamento térmico continuam importantes.
Nylon
O nylon é adequado para aplicações que exigem:
Alta resistência ao impacto
Resistência
Durabilidade mecânica
Resistência ao desgaste
No entanto, nylon é higroscópico, o que significa que absorve a umidade do ambiente. A secagem e o armazenamento adequados do filamento são, portanto, importantes para uma qualidade de impressão consistente.
Filamentos Reforçados com Fibra de Carbono
PLA preenchido com fibra de carbono, PETG, nylon, e outros materiais de engenharia podem fornecer rigidez significativamente maior do que seus equivalentes não preenchidos.
Isso cria uma importante oportunidade de design:
Um material mais rígido pode permitir uma densidade de preenchimento mais baixa, mantendo o desempenho estrutural necessário..
Portanto, mudar o material às vezes pode ser mais eficaz do que simplesmente aumentar o preenchimento.
Qual é o melhor padrão de preenchimento de impressão 3D?
A densidade de preenchimento é apenas uma parte da equação.
O padrão de preenchimento determina como o material é distribuído dentro do componente.
Diferentes padrões são otimizados para diferentes prioridades, Incluindo:
Força
Velocidade de impressão
Eficiência do material
Flexibilidade
Suporte de camada superior
Carregamento multidirecional
A documentação atual da Prusa destaca especificamente a velocidade de impressão, eficiência de materiais, suporte de camada superior, aparência, e flexibilidade como fatores importantes ao selecionar um padrão de preenchimento.
Preenchimento Retilíneo
O preenchimento retilíneo usa linhas retas que mudam de direção entre as camadas.
Vantagens
Geometria simples
Impressão rápida
Uso eficiente de materiais
Fácil de processar
Adequado para muitas peças de uso geral
É particularmente útil quando a velocidade de produção é mais importante que o desempenho mecânico máximo.
A Prusa identifica o retilíneo como um dos tipos de preenchimento mais rápidos e o recomenda para 100% impressão de preenchimento.
Preenchimento giroide
Gyroid é um tridimensional, estrutura continuamente curvada.
Sua principal vantagem é a capacidade de fornecer suporte e comportamento mecânico relativamente uniformes em múltiplas direções..
Vantagens
Boa relação resistência/peso
Comportamento estrutural multidirecional
Uso eficiente de materiais
Caminhos de extrusão relativamente suaves
Adequado para componentes funcionais
Para peças mecânicas sujeitas a cargas de diferentes direções, giroide pode ser uma excelente opção. Prusa descreve o giroide como uma estrutura 3D que fornece suporte em todas as direções com uma boa relação resistência-peso.
Preenchimento Cúbico
O preenchimento cúbico cria uma estrutura de treliça tridimensional.
Pode ser particularmente útil para componentes funcionais sujeitos a carregamentos complexos.
As aplicações adequadas incluem:
Suportes mecânicos
Jogos
Ferramentas
Protótipos funcionais
Componentes estruturais
A Prusa também recomenda tipos de preenchimento 3D, como cúbico e giroide, para peças mecânicas.
Preenchimento Concêntrico
O preenchimento concêntrico segue a forma do perímetro externo.
Pode ser útil para:
Componentes cilíndricos
Peças curvas
Componentes flexíveis
Modelos transparentes
Peças onde a flexibilidade direcional é desejável
Por exemplo, o preenchimento concêntrico pode ser útil em certos componentes impressos flexíveis ou semelhantes a pneus.
Preenchimento relâmpago
O preenchimento relâmpago usa uma estrutura interna ramificada que concentra o material onde ele é necessário para suportar as superfícies superiores.
Seu principal objetivo é redução de material e tempo, em vez de força máxima.
É, portanto, mais adequado para:
Modelos de exibição
Modelos conceituais
Protótipos visuais
Componentes não funcionais
Qual é o padrão de preenchimento mais forte?
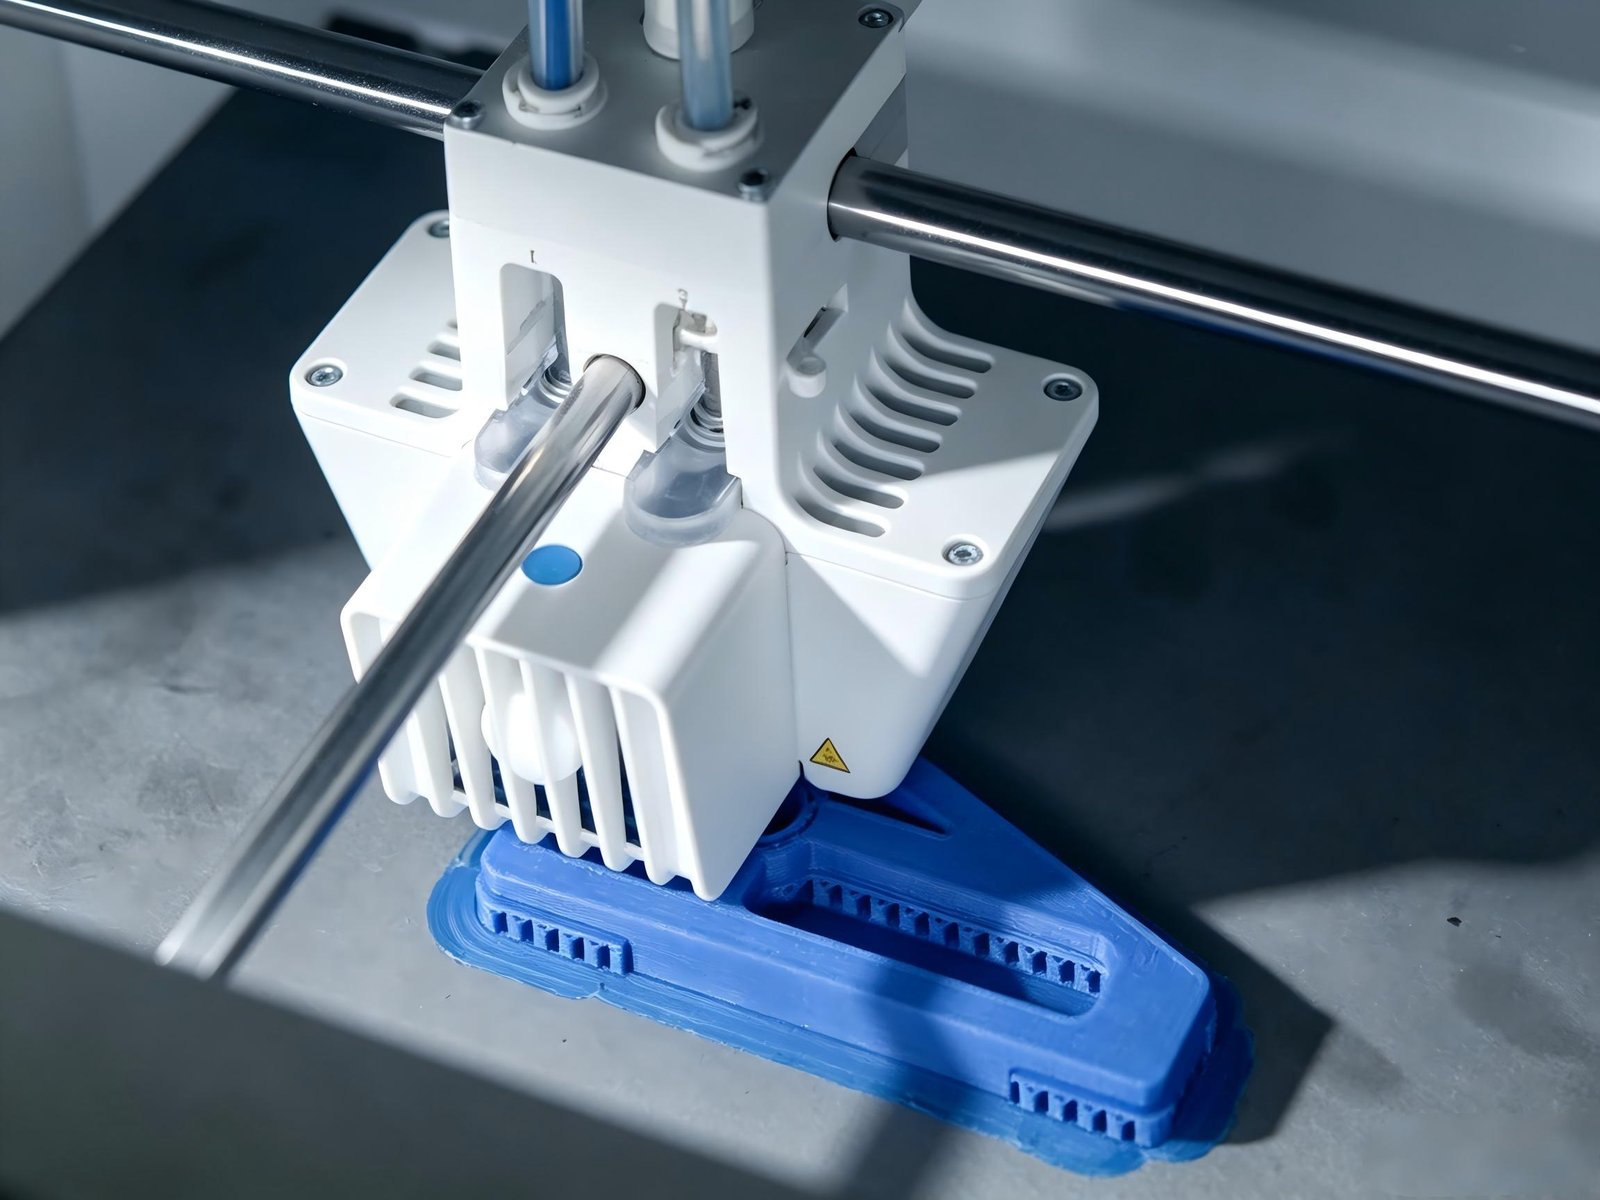
Não existe uma resposta universal para a pergunta “Qual é o padrão de preenchimento de impressão 3D mais forte?”
A resposta depende do tipo e direção do carregamento.
Por exemplo:
Carregamento multidirecional: Giroide ou cúbico
Aplicações mecânicas gerais: Cúbico ou giroide
Projetos estruturais leves: Estruturas cúbicas adaptativas ou outras estruturas de densidade variável
Peças simples não críticas: Retilíneo
Eficiência máxima de materiais: Padrões leves/ramificados
O ponto chave é que a força deve ser avaliada como um sistema, em vez de olhar apenas para o padrão de preenchimento.
Um componente com 30% preenchimento do giroide e quatro perímetros fortes podem superar um componente com 70% preenchimento, mas espessura de parede inadequada ou orientação de impressão inadequada.
Densidade de preenchimento vs.. Espessura da Parede: O que é mais importante?
Esta é uma das considerações mais importantes para peças funcionais impressas em 3D.
Muitos iniciantes presumem que aumentar o preenchimento é a maneira mais fácil de tornar uma peça mais resistente.
Na realidade, as paredes externas ou perímetros muitas vezes têm uma grande influência no desempenho estrutural do componente.
Prusa afirma explicitamente que a resistência do modelo é definida principalmente pelo número de perímetros, e não pelo preenchimento, enquanto o preenchimento é particularmente útil para aumentar a resistência à compressão.
Exemplo
Suponha que você tenha um componente impresso em:
20% preencher
2 perímetros
Em vez de aumentar imediatamente o preenchimento para 50%, você pode primeiro avaliar:
3 ou 4 perímetros
Melhor orientação de impressão
Material apropriado
Melhor adesão da camada
Um padrão de preenchimento mais adequado
Isso pode produzir uma melhor relação resistência-peso.
Princípio de Design Prático
Use o revestimento externo para transportar cargas maiores e use o preenchimento para apoiar a estrutura interna e gerenciar a compressão.
Este princípio é particularmente importante ao projetar colchetes, alojamentos, jogos, ferramentas, e outros componentes funcionais.
Qual densidade de preenchimento você deve usar?
Não existe uma porcentagem universal, mas a seguinte estrutura pode ser usada como ponto de partida:
| Aplicativo | Ponto de partida típico | Abordagem recomendada |
| Modelo decorativo | 0–15% | Priorize velocidade e economia de material |
| Protótipo visual | 10–20% | Preenchimento leve |
| Protótipo geral | 15–25% | Equilibre força e velocidade |
| Protótipo funcional | 20–40% | Combine preenchimento adequado com paredes suficientes |
| Componente mecânico | 25–50%+ | Avalie as condições de carga e a orientação de impressão |
| Componente de alta carga | Específico do aplicativo | Validação de engenharia recomendada |
Esses valores são pontos de partida em vez de especificações de engenharia garantidas. O desempenho real depende muito da geometria, material, orientação de impressão, espessura da parede, adesão da camada, e configurações da impressora.
Para muitas peças de uso geral, Prusa indica que 10–15% é frequentemente suficiente e que o preenchimento acima 30% raramente é necessário, enquanto valores mais altos podem ser apropriados quando maior rigidez, peso, ou resistência à compressão é necessária.
Qual é o padrão de preenchimento mais rápido?
Se a velocidade de impressão for a prioridade, padrões simples são geralmente preferíveis.
Linhas / Retilíneo
Esses padrões usam caminhos de extrusão relativamente simples.
Raio
O preenchimento relâmpago pode reduzir ainda mais o material e o tempo de impressão, concentrando o material perto de áreas que requerem suporte.
No entanto, a compensação é um desempenho estrutural inferior.
Ziguezague
Os caminhos em estilo ziguezague podem fornecer extrusão contínua enquanto mantêm uma velocidade razoável.
Para prototipagem rápida, a melhor solução muitas vezes não é o preenchimento mais forte possível, mas o preenchimento mais baixo que fornece funcionalidade suficiente.
Como equilibrar a densidade de preenchimento, Força, e qualidade de impressão
Selecionar uma porcentagem é apenas o começo.
A qualidade final de uma peça impressa em 3D depende de como o preenchimento interage com o resto dos parâmetros de impressão.
Sobreposição de preenchimento e ancoragem
O preenchimento interno precisa se conectar efetivamente com as paredes externas.
Se a conexão estiver muito fraca, a estrutura interna pode não suportar eficazmente o casco.
Os cortadores modernos também usam âncoras de preenchimento para melhorar a conexão entre o preenchimento e os perímetros.
Qualidade de Superfície
O preenchimento baixo pode, às vezes, contribuir para a má qualidade da superfície superior porque as camadas superiores têm menos suporte interno abaixo delas.
Aumentar o preenchimento pode ajudar em algumas geometrias, mas outra solução pode ser otimizar:
Espessura da camada superior
Contagem de camadas superiores
Padrão de preenchimento
Temperatura de impressão
Resfriamento
Orientação de impressão
Técnicas avançadas de preenchimento de impressão 3D
Para aplicações de engenharia, o preenchimento de densidade fixa nem sempre é a abordagem mais eficiente.
Estratégias avançadas de fatiamento permitem otimizar a estrutura interna de acordo com a geometria e as cargas esperadas.
Densidade de preenchimento variável
Em vez de usar a mesma densidade em toda a peça, regiões diferentes podem usar densidades diferentes.
Isto pode reduzir o peso e o consumo de material sem reduzir desnecessariamente o desempenho estrutural.
Preenchimento Adaptativo
O preenchimento adaptativo altera automaticamente a estrutura interna de acordo com a geometria.
Preenchimento cúbico adaptativo da Prusa, por exemplo, altera automaticamente a densidade de acordo com a distância das paredes e pode reduzir o consumo de material em comparação com o preenchimento retilíneo convencional.
3D Preenchimento de impressão para protótipos vs.. Peças de produção
A estratégia de preenchimento ideal pode mudar drasticamente dependendo da finalidade da peça.
Para protótipos rápidos
As prioridades geralmente são:
Velocidade → Baixo custo → Resistência aceitável
Uma porcentagem de preenchimento mais baixa e um padrão mais rápido podem, portanto, ser apropriados.
Para protótipos funcionais
As prioridades passam a ser:
Resistência → Estabilidade dimensional → Eficiência do material → Velocidade
Um preenchimento médio combinado com paredes apropriadas e um material de engenharia adequado é muitas vezes mais apropriado.
Para peças de uso final
Os requisitos são mais exigentes.
Você pode precisar considerar:
Cargas mecânicas
Condições ambientais
Temperatura
Exposição química
Fadiga
Estabilidade dimensional
Requisitos regulatórios
Repetibilidade
Nessas aplicações, o preenchimento deve ser tratado como um componente do projeto de engenharia geral, em vez de uma configuração isolada do fatiador.
Erros comuns de preenchimento de impressão 3D
Erro 1: Supondo 100% O preenchimento é sempre mais forte
Mais material não resolve automaticamente todos os problemas estruturais.
Má orientação, adesão de camada fraca, paredes insuficientes, ou material inadequado ainda pode causar falha.
Erro 2: Aumentando o preenchimento em vez de aumentar a espessura da parede
Se a falha ocorrer no shell externo, aumentar o preenchimento interno pode ter benefício limitado.
Erro 3: Escolhendo o padrão apenas pelo nome
“Giróide” ou “cúbico” não significa automaticamente mais forte para todas as aplicações.
A condição real de carregamento é importante.
Erro 4: Ignorando a orientação de impressão
As peças FDM são anisotrópicas. Seu comportamento mecânico pode diferir significativamente dependendo da direção da carga aplicada em relação às camadas impressas.
Erro 5: Usando preenchimento complexo com filamentos flexíveis
Estruturas internas complexas podem ser mais difíceis de imprimir com materiais flexíveis. A Prusa recomenda especificamente padrões mais simples, como Grid, para filamentos flexíveis quando ocorrem problemas de preenchimento.
Erro 6: Otimizando apenas para força
Um componente desnecessariamente pesado e caro não é necessariamente uma solução de engenharia melhor.
O objetivo deveria ser desempenho suficiente com uso eficiente de material e tempo de produção.
Perguntas frequentes sobre preenchimento de impressão 3D
Qual é a melhor densidade de preenchimento para impressões 3D fortes?
Não existe uma melhor porcentagem universal. Uma densidade moderada combinada com espessura de parede suficiente, material apropriado, e a orientação correta da impressão costuma ser mais eficaz do que simplesmente maximizar o preenchimento.
É 20% preencha forte o suficiente?
Para muitos protótipos e peças de uso geral, 20% pode ser um ponto de partida útil. No entanto, a densidade necessária depende da geometria, material, carregando, e espessura da parede.
Qual é o padrão de preenchimento de impressão 3D mais forte?
Para muitas aplicações funcionais, Giroide e Cúbico são fortes candidatos porque criam estruturas internas tridimensionais. No entanto, o melhor padrão depende da direção e tipo de carregamento.
O giroide é mais forte que o cúbico?
Não universalmente. Ambos podem fornecer bom desempenho mecânico, mas a escolha apropriada depende da geometria, material, condições de carregamento, e configurações da impressora.
Qual é o padrão de preenchimento mais rápido?
Padrões simples como Retilíneo/Linhas geralmente estão entre as opções mais rápidas porque seus percursos são relativamente simples.
O preenchimento mais alto torna uma impressão 3D mais forte?
Geralmente, aumentar o preenchimento pode melhorar certos aspectos da resistência, especialmente resistência à compressão, mas a relação não é linear. Espessura da parede, orientação de impressão, material, e a adesão da camada pode ser mais importante.
É 100% preenchimento necessário para peças funcionais?
Geralmente não. Muitas peças funcionais podem alcançar desempenho adequado com significativamente menos de 100% preencher. Prusa observa que muitos modelos podem usar 10–15% e preencher acima 30% raramente é necessário para aplicações gerais, embora peças exigentes possam exigir mais.
A espessura da parede é mais importante que o preenchimento?
Para muitos componentes FDM, sim. Os perímetros externos muitas vezes têm uma influência maior na resistência geral do que simplesmente aumentar o preenchimento.
Como posso reduzir o custo de impressão 3D sem sacrificar a resistência?
Considere otimizar a combinação de:
Material
Espessura da parede
Densidade de preenchimento
Padrão de preenchimento
Orientação de impressão
Preenchimento variável/adaptável
Geometria da peça
O objetivo deve ser remover material desnecessário em vez de simplesmente reduzir a percentagem de preenchimento.
Conclusão: Escolha o preenchimento correto, Não é o preenchimento mais alto
3A densidade de preenchimento de impressão D é um problema de otimização de engenharia, não apenas uma configuração percentual.
O melhor resultado vem do equilíbrio:
Força + Peso + Uso de materiais + Hora de impressão + Custo + Requisitos de aplicação
Para protótipos gerais, preenchimento relativamente baixo pode ser suficiente. Para componentes mecânicos funcionais, uma combinação de espessura de parede apropriada, material, orientação de impressão, e um padrão de preenchimento 3D, como Gyroid ou Cubic, pode fornecer melhor desempenho.
Para peças maiores ou mais complexas, preenchimento variável e adaptativo pode melhorar ainda mais a eficiência do material.
Mais importante ainda, não assuma que aumentar o preenchimento de 20% para 50% ou 100% é sempre a melhor solução. Comece com o caso de carga e requisitos funcionais, em seguida, otimize a estratégia de impressão completa em torno deles.
Se você estiver desenvolvendo um componente personalizado impresso em 3D e não tiver certeza de qual material, densidade de preenchimento, espessura da parede, ou a estratégia de impressão é apropriada, fornecendo o 3Arquivo CAD D, 2D desenho, necessidade de materiais, quantidade, e aplicação permite Precisão máxima avaliar o projeto e recomendar uma solução prática de produção.


